We are not much for sandwiches in this house (with the obvious exception of the grilled cheese because you can’t go wrong there). We do, though, have bread for breakfast everyday. Whether or not the oatmeal pot makes an appearance everyone wants bread, be it with a skim of butter or slathered in peanut butter.
I don’t remember how long ago I started baking this bread but we haven’t found anything (bought or homemade) that we prefer. I would like to try mixing it up a bit but it would most certainly lead to a coup. The bread, despite being a full whole wheat dough, is moist, soft and wonderfully flavourful. As an added bonus the recipe makes two loaves and freezes well.
The original recipe is found here and here. The recipe and attached article have lots of great information on the whys and hows of bread making. I highly recommend reading through them if you want to try this recipe.
Here’s how I do it:
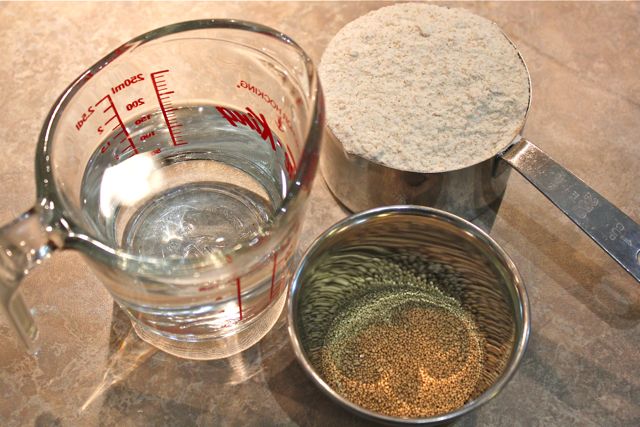
First, gather your sponge ingredients.
Pour them into a bowl.
Mix them up with a fork or spatula.
Lovely, isn’t it?
Throw a tea towel over it and after 45 minutes it looks much better.
Eat breakfast standing in the kitchen, before anyone notices you eating and remembers they want third breakfast.
And here is your sponge…
Now gather your dough ingredients.
After burning out a KitchenAid mixer and leaving one on its last legs, I now knead my breads on the dough cycle of a breadmaker. At this point, I start pouring my ingredients into the breadmaker pan.
*I’ll add a few notes at the end for making the bread in a stand mixer or by hand.
Add the water. I like to pour 1 cup into the pan, then pour the remaining 1/2 cup into the bowl with my sponge to help pry the sticky stuff out.
Add the sponge to the pan. Start the bread maker on the dough setting.
Although the dough cycle includes a rise time, because of the double loaf it will end up ballooning out of your machine, pushing up the lid and making a big doughy mess (speaking from experience, of course) if you don’t move the kneaded dough into an oiled bowl.
Cover it with a towel or plastic wrap and let the yeast do its work for 60-90 minutes in a warm draft free spot. Yeast rises 25 – 50% faster at higher altitudes so I don’t have any problems with the rise here in Calgary but depending on altitude it may take longer.
When the dough has doubled in size dump it onto a counter and punch out the air. You don’t want to knead the dough but you do want to press any air bubbles out. I press it flat into a rectangle and roll like a jelly roll, pressing as I do so to make sure I get all the bubbles. Bubbles in the dough lead to holes in your finished loaf – it’s happened to me plenty of times but it’s better when you can’t see through your toast!
Cut the roll in half, turn the ends under and pop them into buttered or oiled loaf pans. Once again, the original recipe includes great advice on shaping the loaves.
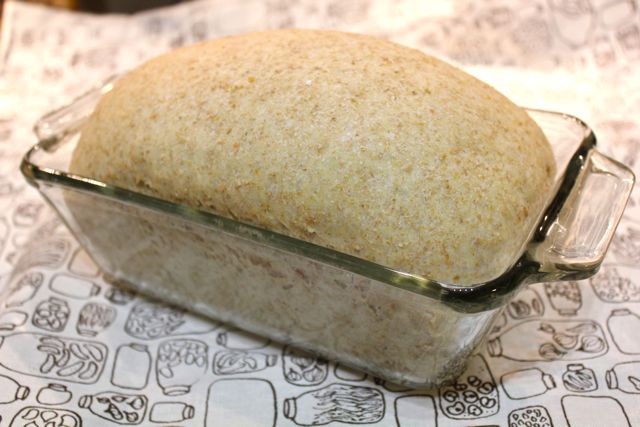
The dough needs one more rise before it’s ready for baking – 45 minutes about does it. Watch for the loaf to rise about an inch out of the pan.
Bake for 40 – 45 minutes at 325°F or until the loaves are lightly browned on all sides (this is one reason I prefer to use glass loaf pans for baking).
Although it is tempting to cut right into the fresh loaves, they will set up better (and actually develop more flavour) if you let them cool for an hour before slicing. Try to be strong.
Here is my adapted recipe:
Sponge
3/4 cup of warm water
4 1/2 tsp of dry active yeast
1 cup whole wheat flour
Dough
1/4 cup honey
1 tbsp salt
3 tbsp oil
1/4 cup ground flax seed
1/4 cup gluten flour (I find it in the natural foods section of my grocery store but a health food store would also have it)
3 cups whole wheat flour
1 1/2 cups whole wheat bread flour
1 1/2 cups warm water
Mix sponge ingredients, proof for 45 minutes. Combine remaining ingredients in breadmaker pan, add sponge and run on dough cycle. Remove after the knead cycle to rise in an oiled bowl for 60 – 90 minutes, or until doubled in size. Punch down dough, cut into two and shape into loaves. Proof for an additional 45 minutes in oiled loaf pans. After they have risen one inch above the pan bake for 40 – 45 minutes at 325°F, or until golden brown on all sides. Let rest for 60 minutes before slicing. Store in a bag in a cool, dry spot.
*For stand mixers or mixing by hand: When the sponge is ready, scatter with 1/2 cup of the flour (this will protect the yeast from the sudden addition of the honey and oil). Add the remaining ingredients, withholding the bread flour, and mix with a wooden spoon. Gradually add the remaining flour either with a dough hook on a stand mixer or continuing with a wooden spoon until combined. Knead with a dough hook on a low speed for 10 minutes or pour onto a counter-top or bread board and knead for 20 – 30 minutes. If your wrists (or mixer) need a break, let the dough rest for 10 minutes and you will find it much easier to work with. Once, it has been kneaded follow the instructions above.
Enjoy!


This loaf is certainly making my mouth water – I haven’t had breakfast yet! Great job in photography and layout.
Mmmmmm!!! Rachel, that bread looks so yummy and tasty. I am a big bread lover I gotta admit : ) Gotta have to try out your recipe very soon. I’ve actually been thinking about baking more bread so this is perfect timing ; ) Your photos visualizing the process are great!! Keep it up!
I miss that bread, and all of your baking so much! I guess it won’t be too long before I’m out there enjoying it again! Love the pictures Rachel!
Thanks, everyone! You should definitely give it a try, Christi!
Oh this recipe looks delicious. I wonder how it will work with my hand milled flour… I think I must give this a go tomorrow morning *grin*. I just had to giggle to myself about eating breakfast standing in the kitchen so no one notices and wants a third round of breakfast! Hahaha, and I thought that I was the only one that had that kind of trouble. I swear if they see food they are instantly starving aren’t they *grin*.
PS. I’m so happy to have bumped into a fellow Canadian 🙂 I’ve only seen photos of the east coast but it is SO beautiful! It’s one of the places that I would love to visit one day 🙂 I hope that one day you will make it out this way to!
I can’t believe you burned through two kitchen aids!! I thought those things were invincible! Maybe I should be a little more gentle on mine?
This sounds delicious. When you put Gluten flour,do you mean gluten free? Or is there actually gluten flour?
Just curious!
It’s is scary what I can do to a KitchenAid (they were both the Professional version – I’m wondering if they may actually be less hardy than the Artisan?) – I’m sure it was all the bread dough I was putting through it.
And although it sounds weird, it is actually gluten flour although in a pinch I have used white flour instead to give it a gluten boost – it’s works pretty well, too.
Mind is the “accolade 400” which is supposed to be the professional version-and so far has held up really well. My only regret is that the bowl is way too small for say…tripling a bread recipe etc.(which is what I normally do-might as well make enough to last the week!)
Weird, I’ve never heard of gluten flour! I’ll have to check that out at the health food store. We’re there on a regular basis anyway. argh-most expensive grocery trips EVER!
[…] into nesting mode. Finding walls and baseboards that suddenly need washing. Continuing to can and bake bread like a mad woman. Organizing and reorganizing dressers and closets. Making endlessly hopeful […]
[…] stock a simmering, bread rising, granola […]